One Room Challenge: Week 2 Floor & Cabinets!
One Room Challenge
Week 2: Flooring and Cabinets
If you look at the photos it may not seem like much was done this week. But, this project has layers (like a cake or lasagna, don't judge me, I am pregnant if you are new here and yes I'd love some cake, thanks) and in order to start the true transformation we have to get through about 4 layers.

.


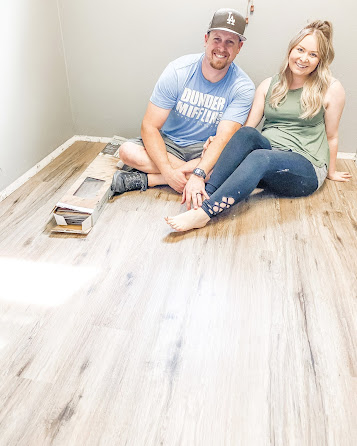
It's a blank slate...

Layer 2: Flooring
We went with Traffic Master Vinyl Plank Flooring because it's a floating floor that doesn't require us to demo the existing tile...less work/less mess...heck yes! It was so easy to install because of the tongue/groove design, the only tricky part is randomizing the pattern. We choose a waterproof plank since it will be exposed to moisture and possible water, hopefully not though.


We went with a basic lower cabinet design that matches our kitchen cabinets with a toe kick. I typically do not like the look of the space created by the toe kick but, for a place I'll be standing a lot to fold clothes I thought the extra space might be better.


Let's talk building vs buying. Which really just is the whole point of why we DIY, $$$. We were able to build 2 full cabinets and a faux cabinet for $84. Doors will roughly add up to $30. Please tell me where you could buy two full cabinets for less than that...I'll gladly wait because if that exist I'll buy them next time. (But Scott will say anything we could buy for that price isn't the same quality)

Next will be adding the counter top and then building a stacked counter to ceiling cabinet that will sit on the counter (obviously) on the side with the faux cabinet. Next to the faux cabinet will be a floor to ceiling broom cabinet. And then we can add baseboards to the entire room (layer 4). See how it wouldn't make sense to add baseboards first.
A change of design almost happened!
Last weekend I reached out the DryAway to see if they would like to work with me on a part of the room. They make these amazing hidden drying racks that slide out and hide away in a cabinet. BRILLANT! I talked to the owner/founder for at least 2 hours going back and forth with sketches, measurements, ideas because he needs 30 inches of depth for the product to work. Well, we only had one area that would work and it was where the washer was planned to go. We came up with a design that moved the washer/dryer to the middle of the wall and nixed the broom cabinet. It would work but, after Scott and I placed items where everything would go (to scale) it made half the folding cabinet/counter useless due the dryer now being too close to it. We would have tried to change the layout more BUT we already bought the countertop and it only fits on the window wall. Sadly, I had to back out but, I'm hoping if this room changes in the future (different style washer/dryer) I'll be able to call him up and fit it in. If you are looking to add something like this to your room contact them, you won't regret it this company blew me away with how nice and truly passionate they are with what they have.

- Finish up all cabinet work (maybe not completely painted but at least built)
- Baseboards & door/window trim installed
- Board and batten on all walls except washer/dryer wall (installed and wood filled if I'm being ambitious)
- Order wallpaper (waiting until broom cabinet is installed so I don't waste money and order too much)
Crossing my fingers we can check this list off because I'm telling you, once the board/batten goes up you'll start to see my vision come to life)


Comments
Post a Comment