One Room Challenge Week 3 Update: It's coming together!
One Room Challenge
Week 3
This is the week that my vision really started to come together...
Last week we left of on the cabinets being installed and adding the countertop

We quickly realized we needed to get the washer/dryer back in this room or we would all be out of clothes very, very soon. So, over the last weekend we worked as hard as we could to get the broom cabinet built/installed and painted & the board/batten wall finished. We had to do the areas that I knew I wouldn't be able to get to after they were back in the room. It was a lot work but it totally paid off.


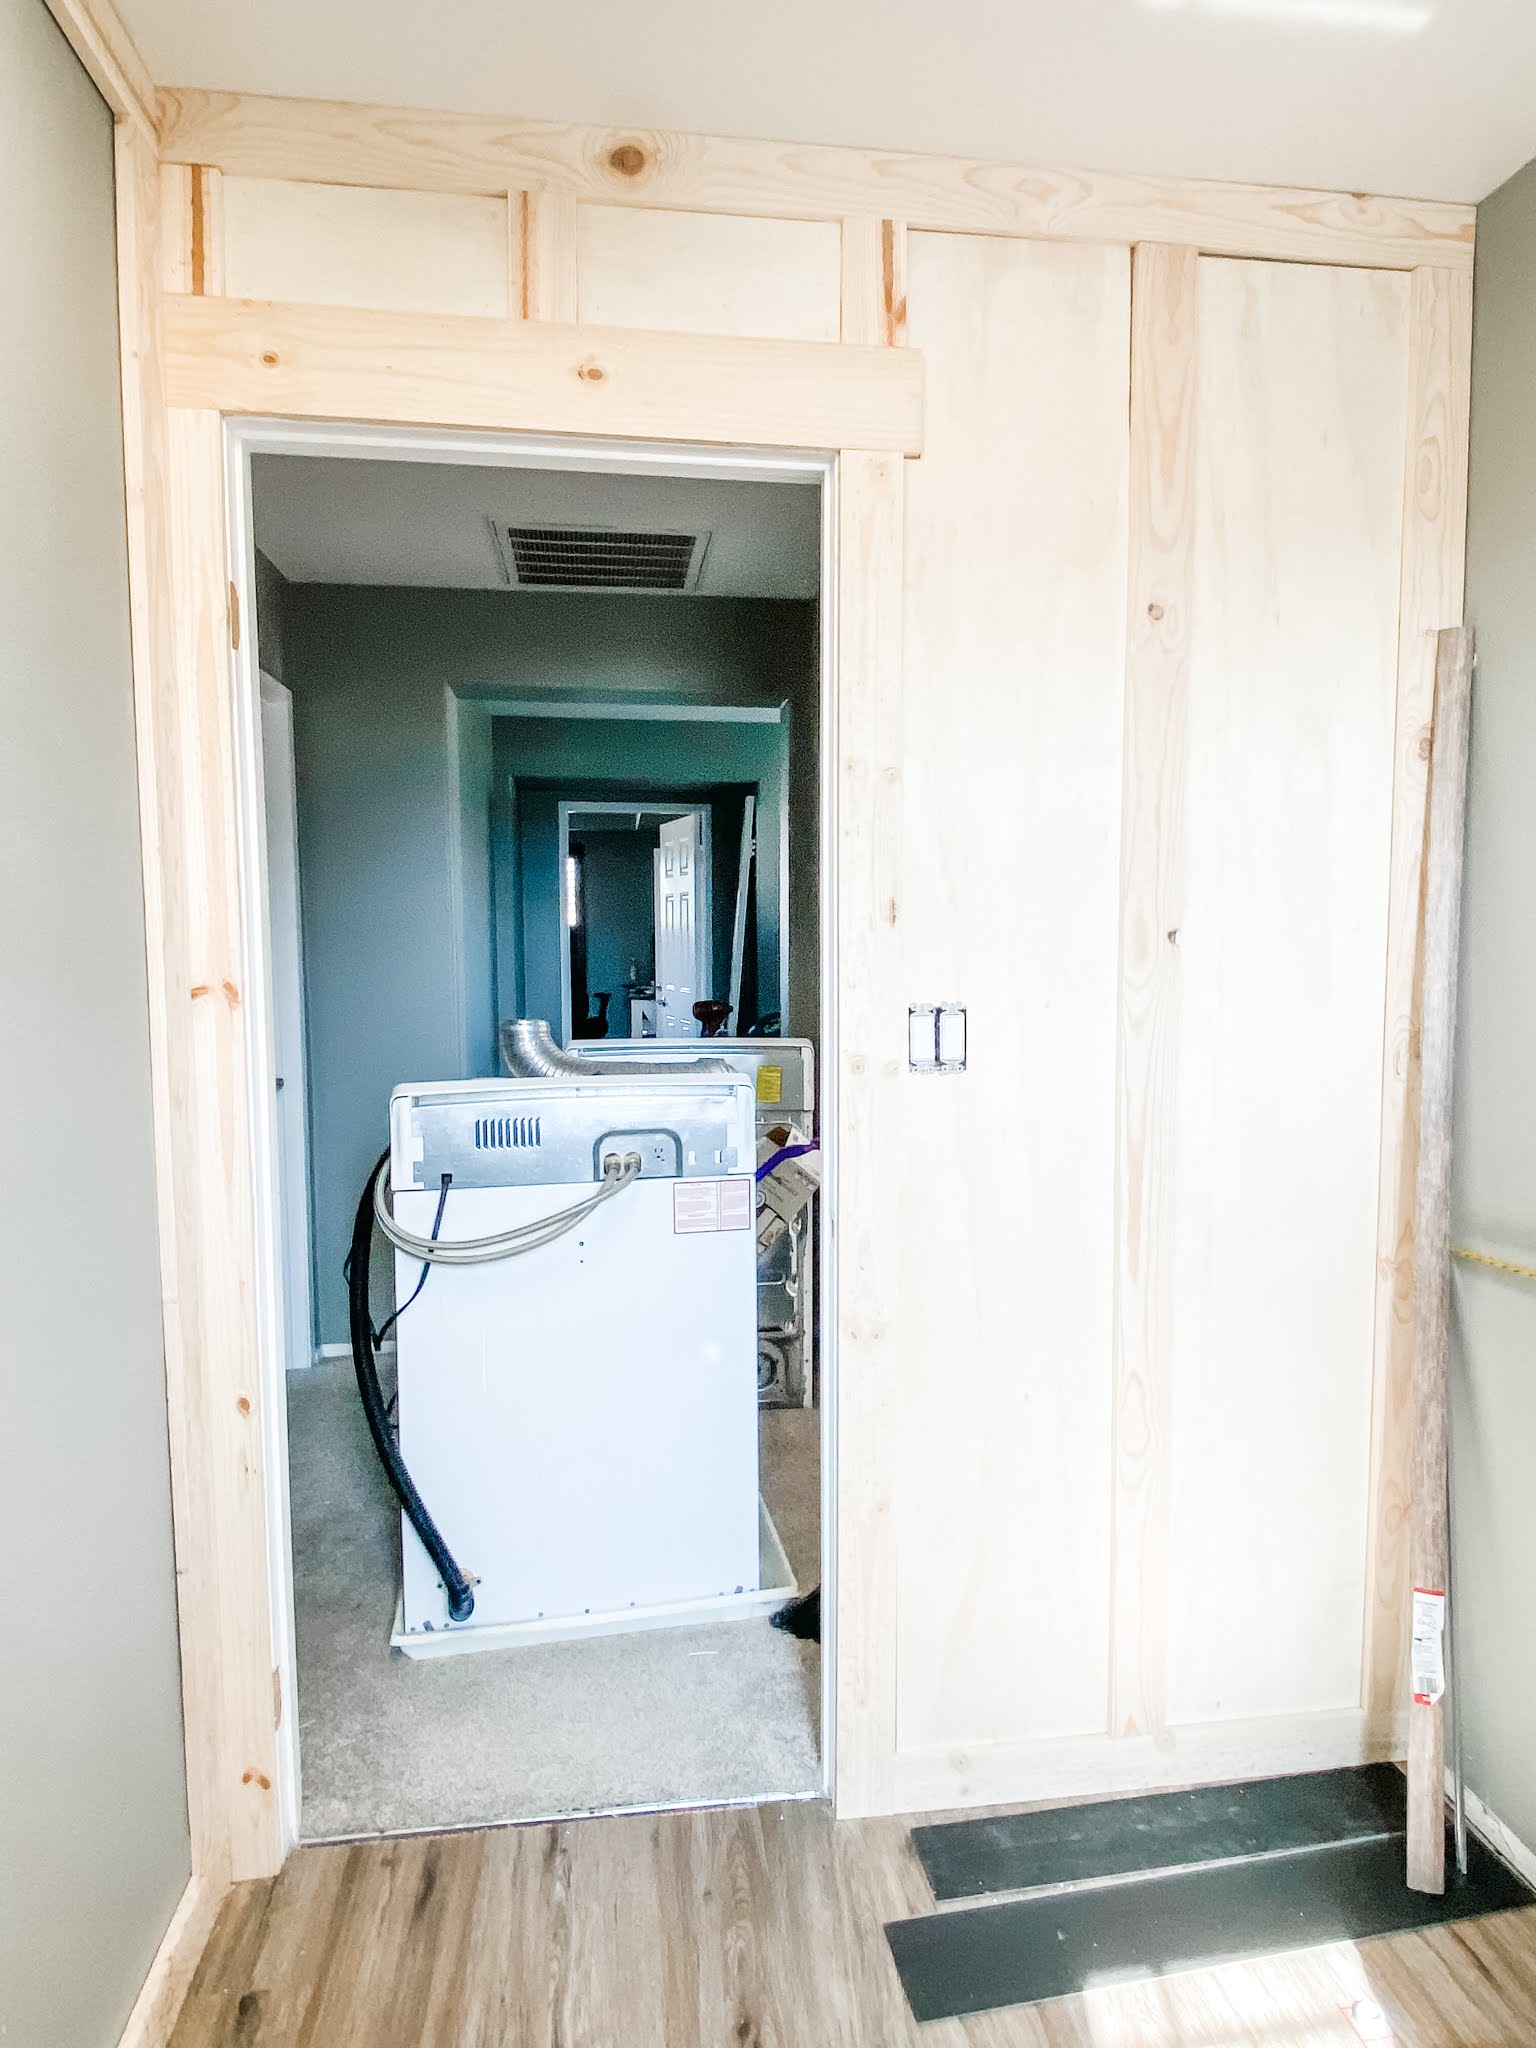
We went with a simple craftsman style door trim and than finished the wall off with floor to ceiling board and batten.

The broom cabinet Scott built was made in order to hide the dryer vent and again we chose not to do backs on these cabinets (just support pieces to screw the cabinet to the wall) to save money on wood and I just didn't find it necessary for the space to have back.

For paint I used the Kilz all purpose primer and color matched Benjamin Moore "In your eyes" in Behr premium paint/primer in one. I did one coat of primer, sanded using a 220 grit sandpaper, and then two coats of paint. Its the perfect dusty blue green that really does pop against white. You'll have to wait for the cabinet doors to really see this color pop.


Scott finished the cabinet builds with the stacked cabinet on the counter and that really completed this built in look. We still need to board/batten the window wall and then trim out the top of the cabinets. Then we finished up the week with another full wall of floor to ceiling board/batten and even little Maverick is enjoying this space coming together.


I knew seeing the walls start to turn white would help to get bring everything together and help you see my vision for this space. We still have more work to do so let me tell what is next.
Wallpaper

This is the wallpaper I'am most likely going with now
(from Wall Blush)
The wallpaper I originally showed in my moodboard sadly will not be happening due to cost. When I was looking at it I did not realize the price shown on the website was per panel and not total cost. It has you enter your measurements and then it calculates a price, other websites I've been on does this too and shows you the full total for all panels needed, so I assumed it was the same for this company. Nope...$300.00 cart and I'm almost in tears. Luickly, I found two other companies that I will be recommending. I am waiting for confirmation from one of these companies on a few things before I order so, hang tight next week I should have more info on the wallpaper situation. (This will be going on the washer/dryer wall)Once wallpaper is installed we will also be building and adding two shelves to that wall. A shelf that will cover the dead space from wall the washer/dryer will also be added to make everything look more built in as well.
Light Fixture

I have a very hard time paying full price for a lot of things in our projects and lights are one of those, a great place to find light fixtures are marketplace apps. I use Offer Up and Facebook, I found a light that is normally around $60 for $30! We are getting it this weekend so this could change if it doesn't work out. We wont be using the chain because we only have a about a 21 inches from ceiling to Scott's head but I think it will still look nice with one of two links.
Goals for the upcoming week
- Finish board/batten on window wall
-Figure out a drying rack
- Hang new light fixture
- Start cabinet doors
- Order wallpaper
Don't forget to follow me on Instagram and make sure you check out some of the other participants on the One Room Challenge Blog


This is looking great so far! Are you using regular wallpaper or removable? That is my dilemma right now.
ReplyDeleteMindy Pugliese
I'll be using the removable peel and stick, I definitely do not have the patience to glue/bookend this stuff lol.
Delete