One Room Challenge Week 5: The Wallpaper Wall
One Room Challenge Week 5
The Wallpaper Wall
This week has been all about this last wall and I think it was worth wait!
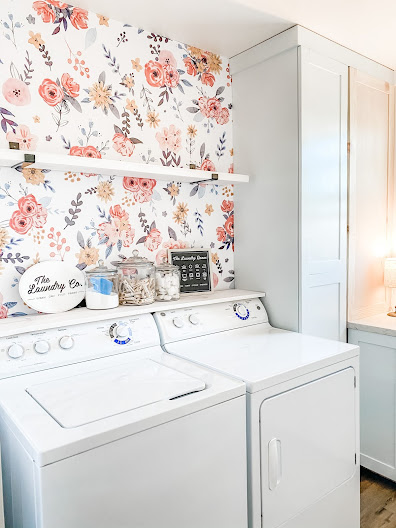
I installed peel and stick wallpaper on the wall behind the washer/dryer from Wall Blush and it was definitely a small challenge for me to do myself. I was able to do it and I'm so proud of the results so it can definitely be done by one person but, if you have help take it. The hard part was lining up the seam because you over lap the paper about an inch so you have to match the print to the print on the other sheet. Again, it's doable along but having someone who can help hold up the other side of the panel to the ceiling/wall would be nice. That was truly the only difficult aspect of it, otherwise it went on like a dream.
The wallpaper is such a beautiful floral print that really brightens up this space. When I walk in I instantly want to smile, which has never happened in a laundry room!
Use code CRYSTALRANSONS at checkout for 10% off you order at WallBlush.com
Thank you so much for working with me on this wall, WallBlush!


I white washed the shelves and I am loving the subtle white/pink color it pulled. It really works on the this wall. It was also my first time white washing and I loved how easy it was!
For the shelf on the washer/dryer we still need to trim out the side between the wall and washer.

The door also got some TLC this week. I went ahead and did two coats of semi gloss white on it and love the brightness it adds. For some reason there is some yellow coming through on some spots that Scott sanded down to the wood so I'll have to do some touch ups later. We also installed the new door knob and I am in love with the character it adds. (I still need to scrape the paint off the windows)


The drying rod was also installed in the cabinet (that got a door! I still need to paint that). The drying rod is pretty neat as it extends out of the cabinet as well to fit a good amount of clothing. This was definitely something that was a must in this room because Scott and I hang dry the majority of our shirts. I wanted something that would either blend into the space or be completely hidden when not it use and this is as good as I think could've done!

Week 6 Goals: Finish the room
We are not done yet!
- Touch up board/batten wall
-Install cabinet hardware
-Paint cabinet door
-Patch ceiling from old light
-Trim on cabinets
-Trim washer/dryer shelf on side
-Build faux baseboard to hide washer pan

Next weeks blog will include decor links and photos as well as detail photos of all the little areas that deserve to be highlighted.
I want to thank WallBlush again for collaborating with me on the gorgeous wallpaper and also Danielle at Goggins Creations for sending me the most amazing sign for this space! [shown above] More on her and the sign next week!
Don't forget to follow me on Instagram, subscribe to my YouTube Channel and make sure you check out some of the other participants on the One Room Challenge Blog


Comments
Post a Comment